How to Clone Your Voice for AI Voiceovers-Cloning your voice with ElevenLabs is like having a superpower for content creation. Whether you’re a YouTuber, podcaster, or just experimenting, it’s worth trying out. Grab a quiet spot, record those sentences, and follow these steps—you’ll have your AI voice ready in no time. Have you tried voice cloning yet? Let me know how it goes!
How to Clone Your Voice for AI Voiceovers
Have you ever wished you could skip the time-consuming process of recording voiceovers for your videos? With advancements in AI, you can now clone your voice and have it say anything you type—no microphone required after the initial setup! In this guide, I’ll walk you through how to use ElevenLabs, an AI tool that makes voice cloning fast and simple. I recently tried it myself, and I was amazed at how easy it was to create a digital version of my voice in just a few minutes. Here’s how you can do it too, step by step.
What You’ll Need Before You Start
- A clear audio recording of your voice (more on this later).
- An ElevenLabs account
Step 1: Sign Up and Upgrade Your ElevenLabs Account
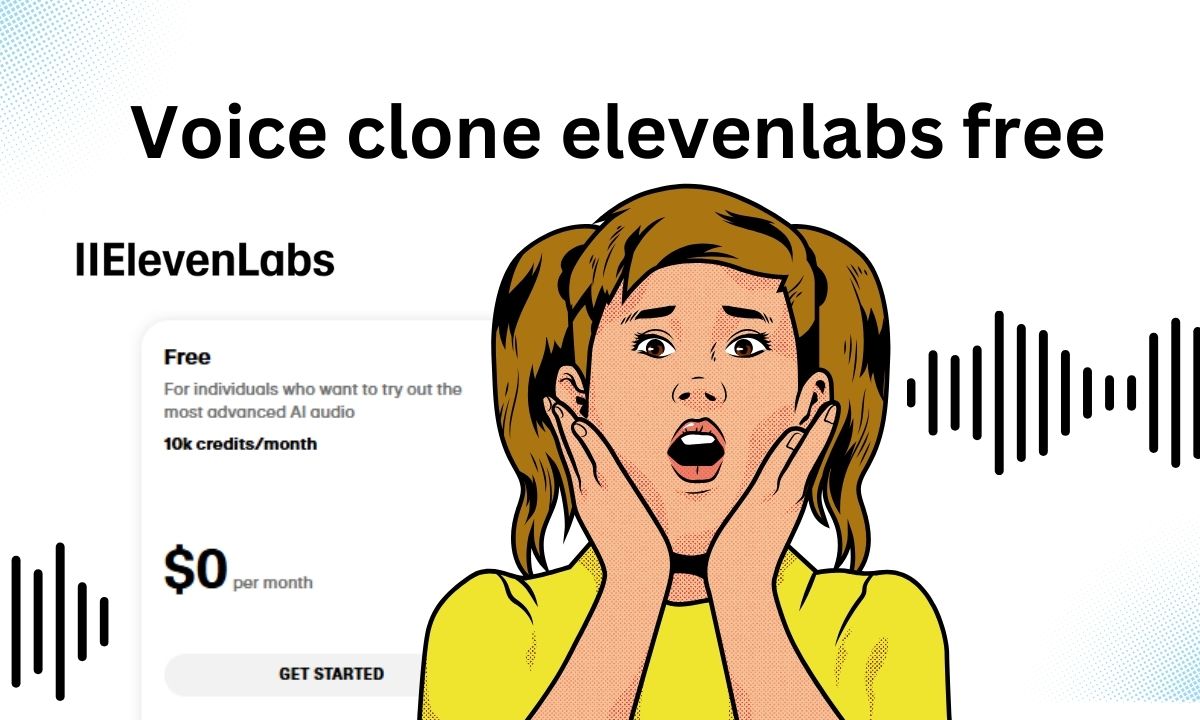
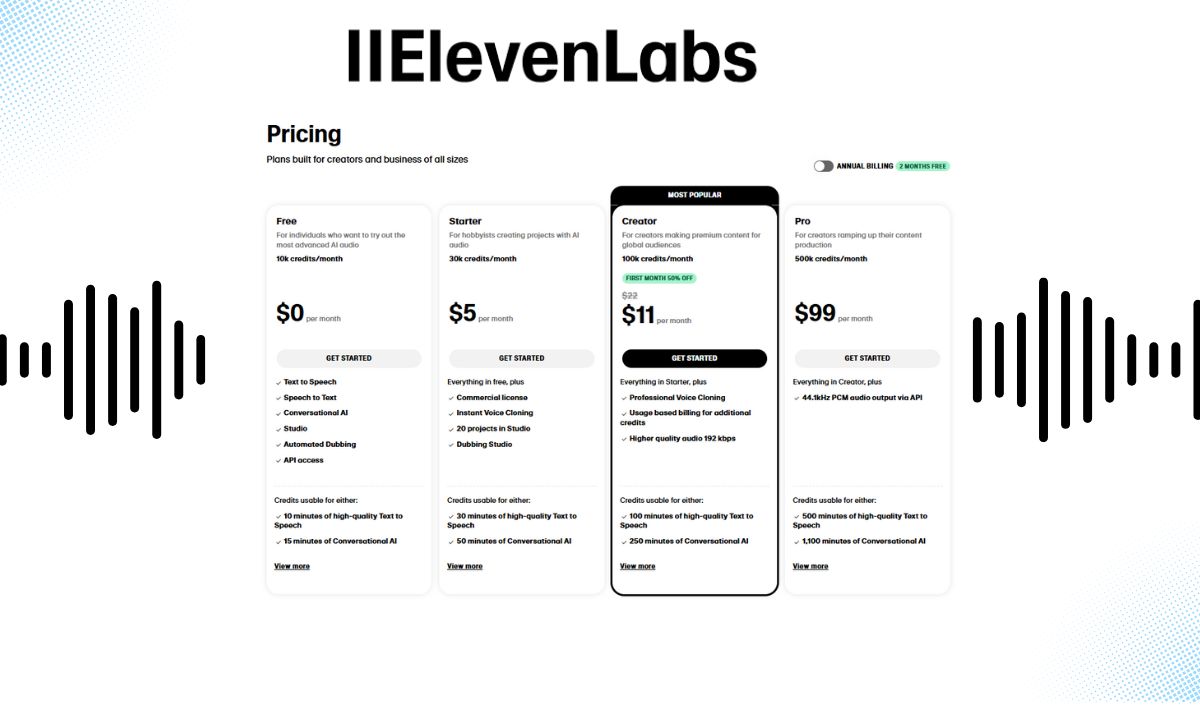
First things first, head over to the ElevenLabs website and create an account. The free version lets you play around with pre-made voices, but to clone your own voice, you’ll need to upgrade to the Starter tier. Don’t worry—it’s affordable, and they often have that $1 first-month promo (check the video description of tutorials online for a link if it’s still active as of March 2025).
Once you’ve signed up and upgraded, log in and get ready to dive into the fun part.
Step 2: Head to the Voice Lab
After logging in, look for the “Voice Lab” section in the ElevenLabs dashboard. This is where the magic of voice cloning happens. You’ll see a clean interface with options to create or manage voices. If you’ve never done this before, it’ll be empty—don’t panic, that’s normal!
To start cloning your voice, click the “Create New Voice” button (it might look like a plus sign or similar icon depending on updates). You’ll see an option called “Instant Voice Cloning”—select that. This feature is what makes ElevenLabs stand out because it’s lightning-fast.
Step 3: Record and Upload Your Voice Sample
Now, ElevenLabs needs to hear what you sound like. You’ll need to upload an audio file of your voice, but there are a couple of rules to follow:
- Keep the file under 10 MB (which is about 5 minutes of audio, depending on quality).
- Make sure it’s clear—no background noise like fans, traffic, or chatter.
I found the best way to do this is to record yourself reading a variety of sentences. You don’t need hours of audio—just 3-5 minutes will do. To make my clone as accurate as possible, I asked ChatGPT to generate 30 diverse sentences that cover different sounds in English (think vowels, consonants, and tones). It took me about 3 minutes to read them aloud in a quiet room using my phone’s voice recorder.
Here’s a tip: If you’re not sure what to say, try sentences like:
- “The quick brown fox jumps over the lazy dog.”
- “Sunny hills bloom with vivid colors.”
- “I enjoy a quiet walk in the park.”
Record in a calm, natural tone, and save the file. Then, in the Voice Lab, click the upload button and select your recording.
Step 4: Set Up Your Voice Clone
Once your audio is uploaded, ElevenLabs will show it on the screen. Now, you’ll need to add a few details:
- Name your voice: Pick something fun or simple like “My AI Twin” or “Voice 1.”
- Add labels: I just noted “British accent” and “male” for mine—keep it basic with your accent and gender.
- Description: Write a short note like “My cloned voice for video narration.”
- Consent: Check the box agreeing to their terms (it’s standard stuff about how they process your audio).
When everything looks good, hit the “Add Voice” button. Here’s the wild part: your cloned voice appears instantly! I expected a wait time of 5-10 minutes, but nope—it was ready right away. Talk about a time-saver!
Step 5: Test Your Cloned Voice with Speech Synthesis
Now that your voice clone exists, let’s make it talk! Go to the main menu and select “Speech Synthesis.” This is where you can type anything and hear it in your cloned voice.
Here’s how:
- Scroll to the settings and choose your newly created voice from the dropdown.
- Type a test sentence in the text box—like “Hey, this is my AI voice, and it’s awesome!”
- Click “Generate.”
In seconds, you’ll hear your voice saying those words. It’s eerie how real it sounds! If it’s not quite perfect, don’t worry—there’s a “Voice Settings” area where you can tweak it. I slid the “Similarity” bar up to 95% to make mine sound even closer to me, but the default was already pretty spot-on.
Step 6: Fine-Tune and Download
Play around with a few more sentences to get the hang of it. If the tone or pacing feels off, adjust the settings (like stability or clarity) until it’s just right. Once you’re happy, hit the download button to save your audio file. You can now use it in videos, podcasts, or wherever you need a voiceover—without ever picking up a mic again.
also you can use this video for better results
Read More